Showing posts with label x-carve. Show all posts

Tuesday, November 30, 2021

Making Cool Wooden LED Christmas Stockings!

My daughter hung our Christmas stockings on the fireplace mantle and decorated them with some Christmas lights.  This inspired me to try to make some wooden stockings that light up.  In this video, I make a set of five cool LED stockings with the Inventables X-Carve CNC Machine.  Inventables sent me their latest CNC upgrades, so we'll take a quick look what's new for the X-Carve CNC as well.


I used the Inventables EASEL PRO software to design this project.  The stocking is basically a box and the front and back pieces are cut from 1/8" Baltic Birch plywood.  The side pieces are cut from 2x6 material, then it's glued together to make the box.  Click here to open my EASEL project for detailed instructions and to access my drawings.

EASEL Stocking Design

I found a Set of 5 Battery-Powered LED Puck Lights that fit perfectly inside the stockings.  They included batteries and a remote control that controls all five puck lights at once.  I simply stuck one light inside each stocking using the included double-sided tape.

LED Stockings

These were really fun to make and they look really cool.  I love the flashing and fading modes on the remote that make the lights change colors.  I hope this gives you some ideas to make some wooden stockings of your own.  Thanks for checking out this project!  Steve...

LED Christmas Stockings

Clicking a referral/affiliate link in this article and making a purchase will help to support my channel via a small referral fee from the merchant.  Thank you for your support!

Tuesday, August 31, 2021

Making a Kitchen Utensil Organizer

We have A LOT of kitchen utensils and our collection has outgrown the containers that hold them.  In this video, I make a HUGE wooden Kitchen Utensil Organizer with the Inventables X-Carve CNC Machine.   This project would be easy to make with other tools as well.


I used the Inventables EASEL PRO software to design this project.  This would make a great housewarming gift for a new homeowner or for anyone who loves to cook.  Click here to open my EASEL design and download the drawings.

Kitchen Utensil Organizer EASEL Design

This was a fun project to design and make.  It solves a problem in our kitchen and those are always the best kind of projects.  Thanks for checking out this project!  Steve...

Kitchen Utensil Organizer

Clicking a referral/affiliate link in this article and making a purchase will help to support my channel via a small referral fee from the merchant.  Thank you for your support!

Monday, May 31, 2021

Making Four Different Beer Flights

If you've ever been to a craft brew pub, you've probably seen the wooden beer flights that they use to carry tasting glasses or pint glasses to your table so you can taste the different beers.  These make great gifts and craft fair items, and you might be able to find a local craft brewery that needs some.  In this video, I make four different Beer Flights with the Inventables X-Carve CNC Machine


I used the Inventables EASEL PRO software to design these.  Making beer flights is a perfect example of how you could use a machine like the X-Carve CNC to mass produce projects to fulfill a large order from a craft brewery.  Of course you can also make these with other tools - Click here to open my EASEL designs and download the drawings.

Easel Beer Flights

If you plan to make a beer flight, I suggest buying the glasses first so you can get accurate measurements for your design.  I bought these 5oz Tasting Glasses from Amazon.  Below are three beer flights I made for these smaller glasses.

Beer Flight

Beer Flight

Beer Flight

On my fourth design, I created EASEL designs for both the tasting glasses and the full size pint glasses.  Here is the beer flight I made for the pint glasses.  I like how the pint glasses sit in the holes securely and will not tip over when being carried.

Beer Flight

Since these beer flights will be in contact with lots of moisture and condensation, picking a finish that will last will be a challenge.  I used spray lacquer for mine which should be ok for periodic home use.  If they will be used daily, I would recommend a marine varnish that is used on boats, or an exterior paint would last a while too.  No matter what you choose, plan on refinishing or replacing the beer flights at some point in the future.

Thanks for checking out this project!  Cheers!  Steve...

Clicking a referral/affiliate link in this article and making a purchase will help to support my channel via a small referral fee from the merchant.  Thank you for your support!

Wednesday, December 23, 2020

Making a Jewelry Box with the Inventables X-Carve CNC Machine

Previously I made a Jewelry Box for my daughter using the bandsaw.  It was a fancy bandsaw box.  I thought it would be fun to challenge myself to make one with my Inventables X-Carve CNC Machine.  I designed a more modern box with shallow drawers and more compartments for separating the jewelry.  I think it turned out pretty awesome!  Check out my video of this project below.

I designed this project using the Inventables free EASEL online software.  The project workspace has 4 tabs at the bottom.  Tabs 1-3 are used to actually cut the parts from 3/4" maple and cherry boards.  The 4th tab contains my original design drawings so anyone can customize the design to fit their needs.  Click here to open my EASEL project to see how it's designed and make one yourself.

EASEL Design

It took about 4 hours of machine time to cut all of the parts using the default settings, which are very conservative.  That's ok, because I got a lot of other stuff done while the machine was hard at work.

X-Carve CNC Machine

I purchased some 1/4" aluminum rod from the home center and cut six pieces that are 3/4" long for the drawer pulls.  I used the drill to spin them while I smoothed them out with sandpaper and gave them a brushed look.  These look great and were super cheap.

Aluminum Drawer Pulls

The design contained alignment holes and I used some pieces of bamboo skewers as pins to keep the boards from sliding around during glue up.

Gluing Up the Box

I applied my favorite finish which is Deft Clear Wood Finish Satin Spray Lacquer and the box came out great.  Thanks for checking out my project!

CNC Jewelry Box


Clicking a referral/affiliate link in this article and making a purchase will help to support my channel via a small referral fee from the merchant.  Thank you for your support!

Sunday, September 27, 2020

Make a Keychain Display Rack

Whenever I travel to some place new, I get a keychain for my keychain collection.   I have about 50 keychains in a plastic bag that I would like to display in my office, so I decided to make a Keychain Display Rack.  Check out my video of this project below.

I designed this project using the Inventables free EASEL online software to design the project.  I added the title of the Dr. Seuss book "Oh, the Places You'll Go" at the top and a grid of 54 holes.  The text at the top can be customized or removed to fit more keychains.  I used a precut piece of Baltic Birch Plywood that is 24" wide x 30" tall x .5" thick for this project.  Click here to open my EASEL project to see how it's designed.

The Carmichael Workshop Keychain Display Design

I used my X-Carve CNC Woodworking Machine from Inventables to carve the letters and drill all of the holes.

The Carmichael Workshop X-Carve CNC

I purchased enough Axel Pegs from Hobby Lobby to fill up the board and glued them into the holes.  I used a small square to make sure they were straight.  These pegs can hold several keychains as I expect my collection to grow.

The Carmichael Workshop Keychain Display Rack

I trimmed the edges of the board with some 1/2" angle aluminum which looks really cool.  These are mitered in the corners and screwed into the sides of the plywood.  Did you know that you can cut aluminum with regular woodworking saws?  I used my bandsaw.

The Carmichael Workshop Keychain Display

Below is the final project with all of my keychains hanging on it.  Each keychain brings back special memories whenever I look through them.  I love having this in my office.  Thanks for checking out my project!

The Carmichael Workshop Keychain Display

Clicking a referral/affiliate link in this article and making a purchase will help to support my channel via a small referral fee from the merchant.  Thank you for your support!

Sunday, December 29, 2019

Making a Guitar Shaped Side Table with an X-Carve CNC Machine

I needed a side table to put next to my favorite chair in my office/music room.  I have several guitars on display, so I thought it would be cool to make a guitar shaped side table to keep the music theme going.  I used my X-Carve CNC Woodworking Machine from Inventables to cut the table top and legs.  Check out the video of this project below.


I'd like to thank Inventables for sponsoring this project.  I used their free EASEL online software to design the project.  The top is cut from a 16"x24" panel of 3/4" walnut.  The legs are cut from a 9"x21" section of 9/16" thick maple.  (I had to plane the maple down to 9/16" thick so that the standard tuning pegs would fit.  I also made the mortises 9/16" wide to match.)   Click here to open my EASEL project to see how it's designed.


The design includes the mortise and tenon joinery for gluing the legs into the table top.  The CNC leaves rounded inside corners on the tenons, so those need to be sharpened up with a chisel, file or saw so the joint will fit tightly.


I purchased an inexpensive set of Guitar Tuners from CB Gitty.  You will notice that one of the holes in the scaled-down guitar neck legs is larger than the others.  This is to mount one of the standard size guitar tuners on each leg.  I strung up a regular .042" A string between the tuners for some additional support to keep the legs from spreading apart under weight.  The .056" E string would be a little stronger and more visible, but I didn't have one on hand.


This Guitar Side Table is a great addition to my office/music room.  I love it and it's a great conversation piece.  The walnut and maple look beautiful and I think the "stringer" at the bottom is pretty clever if I do say so myself.  Thanks for checking out my project!


Clicking a referral/affiliate link in this article and making a purchase will help to support my channel via a small referral fee from the merchant.  Thank you for your support!

Monday, September 23, 2019

Making a Funko Pop Rocks Stage Set

Funko Pops are pop culture action figures made from vinyl.  I collect the Funko Pop Rocks series that features members of awesome rock bands, like KISS and Metallica.  I thought it would be cool to make a concert stage set to display them on, so check out my video below, then read on for more information about this fun project.


I'd like to thank Inventables for sponsoring this project and providing me with the X-Carve CNC Machine that made this a snap to build.  I used their free EASEL online software to design the project, then the machine cut it from a single 1x12 pine board (.75"x11.25"x27").  Click here to open my EASEL project to see how it's designed.


The stage set features a large main stage with a groove in the back to hold a record album cover as a backdrop.


It also has three elevated platforms, four guitar amps, and an overhead lighting truss with an LED Light Strip.  The only other additions were three pieces of 1/2" dowel rod to raise the platforms and a little paint.  (I did not paint the surfaces that would touch the vinyl figures, as some finishes may deteriorate vinyl.)


Some of the drummer figures come with a small drum set, but some do not.  My EASEL design includes a bass drum and a pair of toms that can be glued together and painted for those ill-equipped drummers.


I have Metallica, KISS, Guns n Roses, and Rush.  Angus Young and Animal are sitting in for the missing original GNR members.  I also have The Police and Wayne's World figures in my collection (not pictured).  Thanks for checking out my project!


Sunday, March 24, 2019

Making an Autographed Van Halen CD Frame with the Inventables X-Carve

Back in 1988, I won an autographed Van Halen CD from the Rockline radio show.  It's hard to believe that was over 30 years ago!  I think it's past time to build a display frame for it.  I put my Inventables X-Carve CNC Machine to work to make a cool Van Halen striped frame out of cherry and maple.  Watch the video below, then read further for more details and pictures.


This is a CD single for the song Black and Blue from Van Halen's OU812 album.  It is signed by Eddie, Alex, Michael, and Sammy.  Van Halen is my favorite rock band, so this is a cool thing to have.


I kept the letter that Rockline sent with the CD to prove the authenticity of the autographs.  It has a sketch of an old phone plugged into a boombox to represent calling into a radio show, which looks dated but kinda cool.


I had to be really careful when preparing the blank for this project.  The X-Carve is very accurate, so my frame had to be perfectly square so that the CNC could carve the stripes in the correct place and centered around the frame border.


The frame looks great in the EVH corner of my office.  I should have framed this CD 30 years ago!  Oh well, better late than never.  I hope this project gives you some ideas for framing autographs or other memorabilia.  If you would like to check out this project in the Inventables Easel software, click here to open my project.  You can even carve one yourself if you have an X-Carve.


Clicking a referral/affiliate link in this article and making a purchase will help to support my channel via a small referral fee from the merchant.  Thank you for your support!

Tuesday, November 20, 2018

Making a Wooden Fire Engine with an X-Carve CNC Machine

My wife works for the local fire department and I thought it would be fun to make a wooden toy fire engine that she could display on her desk.  In this video, I used an X-Carve CNC Machine made by Inventables to cut seven sections of wood that get glued together to make up the body of the fire engine.  Check it out and read further for more details.


I used Microsoft Visio to design one side of the fire engine based on a picture of one at our local fire department.  I copied this drawing and simply flipped it horizontally to create the right side.  Then I designed five more sections that would be sandwiched in between.  It was a fun challenge to see what details I could add by changing the outline of the cut.  I added lights, axles, a back panel, and a mount for the water canon.

Visio Fire Engine Design by The Carmichael Workshop

I saved the designs as SVG files and imported them into EASEL.  Did you know you can create a free EASEL account and open my Fire Engine project to see how it is designed?  Click here to open my EASEL Fire Engine Project.

Easel Fire Engine Design by The Carmichael Workshop

The accuracy of the X-Carve CNC Machine really shines on a project like this.  Each piece was precisely cut and lined up perfectly with the others.  I used brad nails to help keep them aligned during assembly.  Very little sanding was required to smooth out the joints.

Wooden Toy Fire Engine by The Carmichael Workshop

I purchased 1/4" and 3/8" Furniture Buttons from the hobby store to use for gauges.  I planned ahead of time and included the correct size holes for these in the design.


I also purchased 11/32" Axle Pegs from the hobby store to hold on the wheels.  The correct size holes for these are in the axel design where the wheels are attached.  The wheels have a slightly larger hole in them so they will spin freely.  A washer is used as a spacer between the wheels and the fire engine.


I used Metallic Silver, Gloss Apple Red, and Gloss Black spray paint to paint the larger sections of the fire engine.  Acrylic paints from the art store were brushed on for the details.  It took several coats of paint to cover the base colors.  This is a great project for practicing painting.


My wife really likes the fire engine.  I wonder what the other people at the fire department will think of it.  Perhaps they will enjoy the Atomic Fireballs that are stuffed in the back compartment!  Thank you to all of the Fire Department Personnel out there who have committed their lives to helping people every day!

Wooden Toy Fire Engine by The Carmichael Workshop


Clicking a referral/affiliate link in this article and making a purchase will help to support my channel via a small referral fee from the merchant.  Thank you for your support!

Saturday, June 2, 2018

Make a Headphone Stand - Inventables Easel Power Hour Project

Inventables is hosting an Easel Power Hour Challenge contest during the month of June 2018.  They are giving away gift cards and an X-Carve CNC Machine.  In this video, I make a Headphone Stand as an example of a project that can be designed in their Easel software and carved in less than an hour.  Watch my video, then visit the Easel Power Hour Challenge page on the Inventables website for the contest rules.  Good luck!


The Headphone Stand looks great in my office.  This project can also be made using a scroll saw or other tools.  Click here to download my PDF cutting template.

Headphone Stand by The Carmichael Workshop

The headphone cord inserts perfectly into an oblong hole on the stand to keep it nice and tidy.  Plus, even the 1/4" adapter plug has a home.

Headphone Stand by The Carmichael Workshop

It is in the shape of a music note and it's cut from some really nice walnut for a classy look.  Now it's time for me to go listen to some music!  Later, Steve...

Headphone Stand by The Carmichael Workshop


Clicking a referral/affiliate link in this article and making a purchase will help to support my channel via a small referral fee from the merchant.  Thank you for your support!

Tuesday, May 22, 2018

Making a CNC Serving Tray - An Inventables Easel and X-Carve Project

My wife requested that I make her a large Serving Tray to put on the ottoman of our new living room furniture.  This was a perfect project for the Inventables X-Carve CNC Machine.  Watch my video showing how I designed the project in the free Easel software and carved it on the X-Carve.


Anyone can create a FREE Easel account and design CNC projects, even if you don't have a CNC machine!  CLICK HERE to create your account and begin designing.  If you design a project, I would love to see it.  In Easel, click the File menu and choose Share, then click the Shared With Link option.  Copy the link and Save, then email the link to me at thecarmichaelworkshop@gmail.com.  I will review all projects submitted by June 6, 2018 and pick a few to carve out and ship back to the designers.  This is gonna be fun!


Do you have a CNC machine?  If so, click here to open my Easel project and carve one of these yourself!  The Serving Tray turned out great and my wife loves it!  It's made from ambrosia maple and hardwood plywood.  Wanna use regular tools?  Then, click here to download my FREE PDF Cutting Template for this project.  It's 21.5" square and just the right size for a large pizza!

CNC Serving Tray by The Carmichael Workshop

CNC Serving Tray by The Carmichael Workshop

CNC Serving Tray by The Carmichael Workshop


Wednesday, August 9, 2017

Review of the New 2017 Inventables X-Carve with Upgrades

Inventables, the maker of the X-Carve CNC Machine, contacted me and asked if I would like a free 2017 X-Carve with upgrades so that I can compare it to the previous 2015 model.  They wanted my honest opinion about the improved assembly process and upgrades, so that's what I gave them in my video review below.


To learn more about Inventables and their products, please click the affiliate links below so they know I sent you.
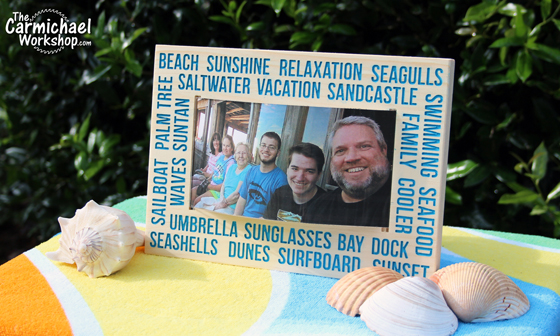
My first project on the new X-Carve is this picture frame.  It's a one-sided carve and the picture is held in place by bending a piece of clear acrylic and wedging it between two frames.  The frame can be customized for any theme by changing the words.  I was going to leave the letters plain, but my wife decided I should paint them...she was right as usual!  Click here to view and copy my Easel project.

The Carmichael Workshop X-Carve CNC Picture Frame


Overall, I really like the new X-Carve and the upgrades that they've made.  The assembly seemed easier this time although it still took me about 10 hours over the course of a week.  I made a new table for the X-Carve that is 40"x52" and it fits nicely.  I am donating my old X-Carve to my local woodworking club, the Gwinnett Woodworkers Association, so more people can learn how to use a CNC machine.

The Carmichael Workshop New 2017 Inventables X-Carve

Here's what I like about the new 2017 X-Carve:
  1. The holes in the ends of the extrusions come pre-tapped with threads.  That was 3-4 hours of torture on the old X-Carve that has been eliminated.  Thank you Inventables!
  2. The Dust Collection Kit is awesome and works incredibly well.  It's my favorite upgrade.
  3. It's good to see the Dewalt DW611 is the stock spindle now.  Upgrading an older X-Carve spindle with this DW611 Mount is easy.
  4. The X-Controller has more power which will help drive the machine through a variety of materials better, especially with the added weight of the Dewalt router and dust boot.  I really like the pause/play controls and the e-stop button that are on it and the sideboard is a nice addition.
  5. The gantry rail is now a solid square extrusion, which is much sturdier than the pair of thin maker slides that were on the old X-Carve.
  6. The drag chain and cable management features are much improved.
  7. The eccentric spacers that are held on by nylon lock nuts will eliminate the issue of the eccentric nuts coming loose on the old X-Carve.
  8. The Z-Probe is cool and eliminates the need to used a slip of paper to set the bit height.
  9. The new Belt Sleeves are a better solution than tape for keeping belts from slipping..
  10. The 60 Piece Clamp Set makes clamping materials up to 1.75" thick much easier.  You could not do that with the old wooden clamp set.
These are the areas that I think still need some improvement:
  1. Belt tension causes problems for lots of people.  A different method of driving the router around could be more user friendly, but I suppose it would increase the price.
  2. I found some discrepancies in the assembly instructions and pictures.  I submitted my notes to Inventables so they can make corrections to help future customers.
  3. The DeWalt router comes very close to the Z axis plate as it nears the homing switch.  More clearance would be nice.
  4. A knob should be included in the kit for raising and lowering the router manually.  Bob at I Like to Make Stuff designed this one that can be 3D printed.
  5. The kit contains the exact amount of most parts.  I had a few leftovers that must be extras, but I still wonder if I missed something.
  6. There is a small packet of lubricant in the kit, but no mention of it in the instructions.  I found a user forum post that explained it was for the threaded rod.  I didn't use the lubricant because I thought sawdust might stick to the rod and gunk it up.  Others recommended dry lube.
  7. A storage rack for the clamps, wrenches, z-probe, etc would be nice.  I found several rack designs by other users in the Inventables projects, so that will be my second project.
Thanks for checking out my review of the new 2017 Inventables X-Carve!  If you have any questions about it, message me on my Contact Page or visit Inventables and check out their User Forum.  There are lots of people there willing to help!  Stay dusty my friends!